Should you use a site-specific plugin? And what site-specific plugin is? To answer these questions, it depends on your need. And what is that need? We’ll get into that later, let us first discuss what a site-specific plugin is.
A site-specific plugin is a custom made WordPress plugin where you can paste your own customize snippets/code. It is where you will put all the custom functionality that your heart desires for your website. This custom plugin will be uploaded and activated on your WordPress website.
In the past, you may have dedicated some of your time to customize your WordPress website. You are looking for the snippet that will add extra functionality to your website. You come across guides that you need to add a snippet to your theme function file. Adding a custom snippet to the theme function file is not recommended. That’s why you need to use a site-specific plugin.
Why do You Need One?
Most of the WordPress guide for introducing new functionality to the WordPress website needs to add custom snippets to the theme function file in one way or the other. There are disadvantages when you use your theme function file for adding snippets. You don’t have the flexibility and freedom.
All your code will be overridden whenever you update the theme or when you plan to switch to a different WordPress theme. Yet, you can backup the snippets whenever you plan to update or change your theme. Then, later you can merge back the snippets to the function file. But that will consume your time and energy.
When you use a site-specific plugin, you don’t have to worry about when you update or change your WordPress theme. This will make the snippet to be theme independent.
We hope that you have understood about a site-specific plugin and why do you need it. If you still have doubts, feel free to ask questions in the comment section at the end of this article. Now let us guide you on how to create a site-specific plugin for your website.
How to Create a Site-Specific Plugin?
Even if you are not a developer, you don’t have to worry. We’ll show you a step by step guide on how to create a site-specific plugin.
The first thing you need is a text editor. There is an inbuilt text editor for all the Operating Systems. But, those are not designed to write code. A text editor such as Notepad++ or Atom will be perfectly fine.
Now open the text editor and create a plain new file and add the below code to the beginning of the file. This helps WordPress to recognize the plugin.
<?php
/**
 * Plugin Name: Site-Specific for InitBlogger
 * Description: Site-specific plugins design for initblogger.com
 */

/* Start pasting the snippet below this line */
After that, you can go ahead and add your custom snippet. We have an example snippet below that can be used on your WordPress website.
<?php
/**
 * Plugin Name: Site-Specific for InitBlogger
 * Description: Site-specific plugins design for initblogger.com
 */

/* Start pasting the snippet below */

// Disable XML-RPC
add_filter( 'xmlrpc_enabled', '__return_false' );
Once you added all the snippets that you needed, save the file as initblogger-site-plugin.php. Feel free to replace the file name with your own. Do note that the file name should contain only lowercase letter without space. You can use a hyphen if needed.
Now, create a new folder with the same name that you have used for the naming the file (without the extension i.e. php). In our instance, the name of the file is initblogger-site-plugin.php. So, the folder name should be initblogger-site-plugin.
Next, Move the site-specific plugin file to the folder that you have created. And create a zip file of the folder that contains your site-specific plugin.
Congratulation! You have just created the custom plugin for your WordPress website. Now, its time to activate it.
How to Activate a Site-Specific Plugin?
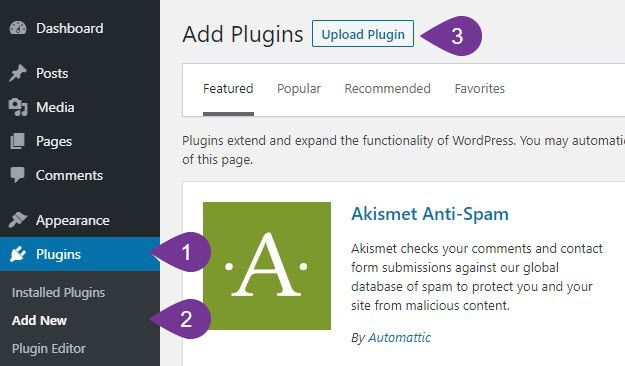
Once the zip file is ready, log in to your WordPress website and navigate to Plugins » Add New then click on Upload Plugin.
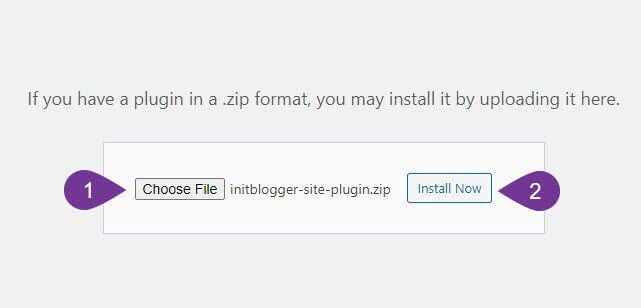
Choose the zip file of the site-specific plugin that you have created earlier and then click on Install Now.
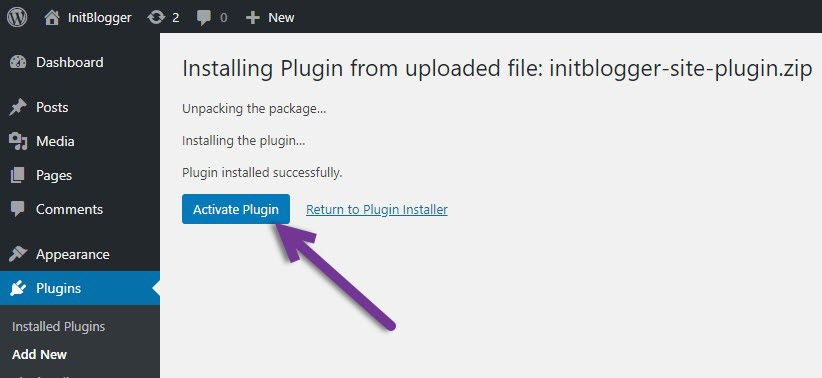
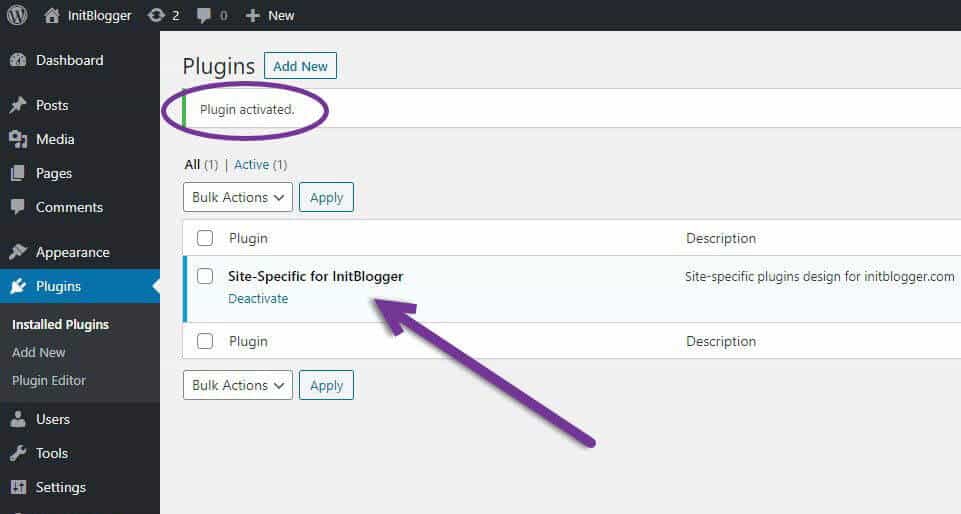
Once the file is successfully uploaded, you can go ahead and activate the plugin. Click on Activate Plugin to activate it.
If you do everything right, you will see your plugin in the plugin list of your WordPress website.
We hope this article helps you to understand and create a site-specific plugin for your WordPress website. If it does, then please consider subscribing to our Newsletter for updates from us whenever we published. You can also follow us on Facebook and Twitter.
If you have any questions or suggestions, please feel free to leave a comment in the comment section below.